
Navigating a Tricky C++ Coding Test - My Experience and Tips
Introduction
A small company that I was interested in recently sent me a coding test. The test was set up to be a challenge that takes somewhere between 3 and 9 hours. I decided to take the test, and I want to share my experience with you. I’ll start by describing the test itself, then I’ll discuss how I approached it and what I learned from the experience. Finally, I’ll offer some tips for anyone who may encounter a similar coding test in the future.
The Coding Test
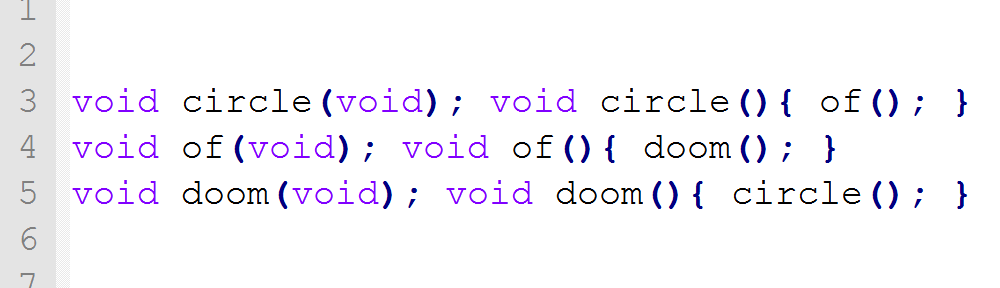
If you are familiar with neetcode.io or took part in any code golf challenges you can imagine one of these challenges. I do not want to give away too much information about the test, but I will say that there was a map in the center that contained a data series in desperate need for in memory compression. Like godbolt.org, the test had a textbox that took my code, but unlike godbolt.org, I was only provided with the body of a function.
You were allowed to use a local dev setup and it was mandated that gcc 7.2 with -std=c++17 had to be used. For me that meant that I had to use a docker container to compile my code. I used the following oneliner to compile and run my code:
docker run -it --rm -v "$PWD":/usr/src/myapp -w /usr/src/myapp gcc:7.2.0 bash -c "g++ -std=c++17 -O2 -Wall -pedantic -pthread code.cpp && ./a.out"
The challenges of the test were mostly in the test setup and how it presented itself. Like most online labs / challenges some convenience options are present:
- a compile button to check if your code compiles
- a finalize option to check if you meet the requirements
- a convenient list of all the requirements
- a continue button to get to the next question - or so I thought.
The test lacked any information on the expected test cases, which is typically something a programmer would discuss with a client. Instead, test cases had to be inferred, which may be a deliberate screening tactic by the company.
In reality there was no next question - it was just the one function and that would be it. The convenient checker turned out to be my downfall.
The Evaluation Process
The challenge did not come with any unit testing facility other than a friend function in the class that needed implementing. Using the friend function I wrote an assert based test suite that would check if the function worked as expected. I worked through roughly 12 test cases and thought this might just be enough for the first question. I did not track my time but it felt like a long time had passed and I wanted to get to the next question.
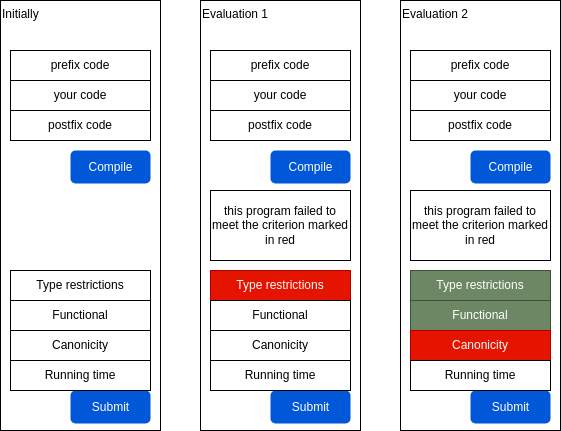
I pressed the finalize button and was greeted with a message that my code did not pass one of the requirements. “Unfortunately, this program failed to meet the criterion marked in red:”
There was one criterion marked in red and it was a simple one. I used bracket assignment which implies a default constructor. The criterion was that the default constructor should not be used. I was slightly surprised that the other requirements were not marked in red as well. I fixed the issue and pressed the finalize button again. There was no second question and the test was over.
After the second evaluation I realized the underlying requirement check implementation. Instead of a test suite that would run all tests and give feedback on each requirement, to my surprise the implementation was the one that goes through a list and exits on the first failure. Meaning that the subsequent requirements were not checked at all. In the first evaluation my failure was on the first element, showing me two states: marked and not marked. In the second evaluation my failure was on an element further down revealing that there are more states - at least red, green and unmarked.
Lessons Learned and Tips for Success
-
Use your setup with all your tools - don’t deviate from your usual workflow. During the test, I didn’t follow my usual strategy of using all the tools available to me. As a result, I missed a requirement that I could have caught with fuzz testing. If you are looking for C++ tools - here you go: The Tools
-
Clarify the test requirements before starting. Before starting the test, it’s important to clarify the test requirements with someone. I failed to ask any questions and assumed that there would be multiple questions based on the length of the test. This assumption led me to approach the test in the wrong way.
-
Write your own tests for all requirements. While using the built-in testing facility may seem convenient, it’s important to write your own tests for all the requirements. During the test, I thought I could rely on the built-in testing facility, but it turned out that it only checked the requirements in a specific order, and didn’t catch all the mistakes I made.
-
Give it your full attention. Don’t be sloppy and give the test your full attention. Even if the company isn’t able to offer a competitive salary, they put effort into creating a challenging test. I regret not giving the test my full attention and feel like I betrayed the person who put effort into creating it.
Conclusion
As I reflect on my experience with this coding test, I performed poorly - despite my years of experience writing code. I didn’t follow my usual workflow, I didn’t clarify the test requirements, I didn’t write my own tests, and I didn’t give it my full attention. These are valuable lessons that I hope will help others in the future - I certainly will follow my own advice next time I encounter a coding test.